If you want to take your pizza making to the next level, you need to try a cold ferment pizza dough. The key to making a good pizza dough is to give the yeast time to work its magic, and the best way to do this is to let the dough rest overnight in the refrigerator.
Once you’ve tried this cold fermented pizza dough, it’ll be your go to pizza dough recipe every time!
The aim of this article is to help you learn how to make a tasty pizza using my go to cold ferment pizza dough recipe. It gives you pizza with incredible flavor and texture, plus its incredibly simple.
Before I get into the recipe it’s worth understanding that even though this recipe is easy, it does take time. You also want to make sure you use the very best ingredients.
If you’re looking for a pizza dough that only takes a couple of hours to make, this is not the best recipe to follow. Instead I would check out this quick ooni pizza dough recipe.
Below you’ll find my cold fermented pizza dough recipe. I’ve then gone into more detail below the recipe on the cold ferment process, key ingredients and the best way to bake pizza dough.
Looking forward to making the very best pizza dough?
Let’s get started!
Best Cold Ferment Pizza Dough Recipe
PrintThe Best Cold Fermented Pizza Dough Recipe

The best cold fermented pizza dough recipe. Easy to make and tastes incredible.
Ingredients
-
12.8 oz (364g)
-
4 tsp (18g) salt
-
1.8g active dried yeast
-
21.4oz (607g) “00” flour
Instructions
- Boil 1/3 of the water and combine with the remaining 2/3’s
- Dissolve the salt in the water
- Stir in the yeast
- Add yeast mixture to flour and stir
- Combine until forms a dough
- Knead for 5-10 minutes
- Place in the fridge for 24-72 hours
- Split into 230-250g dough walls
- Shape balls and place into separate containers
- Leave at room temperature for 4-5 hours
What Is Cold Fermented Pizza Dough?
If you’ve made any pizza dough in the past, you’ll know what fermentation is.
It’s basically the process in which the yeast eats the sugars in the flour and converts it into gas. When making dough, this is what causes it to rise.
Fermentation doesn’t just make the dough bigger, it also helps to develop a tasty pizza dough.
It’s said that the longer your dough ferments, the better the flavor of the dough.
In order for it to develop longer, you need to slow down the fermentation process. This is essential as it takes longer for the yeast to eat the sugars, resulting in a much better flavor.
However if you’re providing the pizza dough at room temperature, the yeast will tend to work quicker.
In order to slow it down, you need to bring the temperature right down.
This is where cold fermentation comes in. We basically make the dough and place it in the fridge to prove at a very low temperature for a longer period of time.
If you want to experiment with pizza dough, give cold fermentation a try!
How To Store Cold Fermented Pizza Dough In The Fridge
The great thing about cold fermented pizza dough is that you dont actually need to do much different to when you create other pizza dough.
You just need to keep it colder by placing it in the fridge. And lowering the amount of yeast you need of course.
Since it’s proving longer, you don’t need as much yeast.
So instead of proving your dough at room temperature, you just need to pop it into the fridge.
Now generally speaking to make cold fermented pizza dough, you want it proving at temperatures of 59-64°F, or 15-18°C.
It can be incredibly hard to get it to this temperature, if you dont have a separate temperature controlled food storage unit. Which lets face it, most of us dont have…
This is where your fridge comes in, although it tends to be a lot colder.
Since it is colder, you just need to leave it to ferment for longer.

How Long Should Pizza Dough Be Cold Fermented?
The amount of time you should ferment the pizza dough in the fridge is debated by many pizza lovers.
Some believe that it should be proved for 24-72 hours, whereas others say it should be 24 hours and any more than that doesn’t make a difference.
Both do agree that it should be cold fermenting for a minimum of 24 hours.
One of the great things about making a cold fermented pizza dough, is it causes less stress and rush making sure you have dough in time.
As long as it’s been proven for 24 hours, you can use it anytime!
Ingredients For Cold Fermented Pizza Dough
The great thing about pizza dough is that it doesn’t need many ingredients, just four!
However, to make cold ferment pizza dough, you do need quality ingredients.
You need a strong flour that can develop a really good gluten structure. Not only that but a good flour will help give you the amazing flavor you’re looking for.
Lets face it, if you’re going to be waiting 24-72 hours for your dough to prove and ferment, it makes sense to use the best quality ingredients.
Cold Fermentation & The Flour
The flour you use plays a vital role in the end result of the pizza dough. This makes it the most important ingredient.
It doesn’t really matter what type of salt you use or water collected from the fountains of some mountain. The most important thing is the flour, which makes sense since the pizza dough is mostly dough.
The flavor that is developed during fermentation is because of the flour.
What Is the Best Flour for Cold Fermented Pizza Dough?
When making pizza dough, I’ve tried a wide range of flour. The best results have come from using a Tipo 00, which is an Italian strong flour. I’ve had okay results with strong bread flour but it’s not ideal for the best cold fermented pizza dough.
A good quality Tipo 00 flour will help you get the stretchy and elastic dough that’s needed to give you the structure you need when shaping the dough.
It helps to retain its shape because of the strength of the gluten within the dough.
I also find that this flour is much easier to knead and just better to generally work with.
What Flour Would I Recommend?
Ill get straight to the point. In my experience and during my testing, Caputo Pizza Flour has given be the best results. Its perfect for any type of pizza dough, whether its cold fermented or not.
Its certainly not the cheapest, however it is certainly one of the most popular and even used by many pizzerias. In fact the flour is even recognised by the AVPN (Neapolitan Pizza Association).
I’ve had several Tipo 00 flours, some cheaper than others and I do think Caputo is the best. With cheaper flours I’ve sometimes over proofed the dough due to it being a hotter day, this resulting in a very flat looking dough ball.
With Caputo Pizza Flour, I’ve not experienced this. The dough is so easy to knead, ball and shape. The taste of the dough when cooked is also perfect.
Water
Water is also very important as you need to make sure that its not only clean but also the right temperature. Warm water is needed to help activate the yeast, too cold and it wont do anything, too hot and it could kill the yeast.
I find a little hack to get the right temperature is boiling ⅓ of the water. Add this to the remaining ⅔’s and you should get the ideal temperature.
Yeast
You have a few choices when it comes to the type of yeast that you use. Fresh can give the dough some additional flavor but dried is so much easier to use and lasts longer.
Personally I go for a good quality instant dried yeast. Its quick to activate, it lasts longer and you don’t need as much of it.
It’s also a lot easier to find as most stores will sell it. Fresh yeast, you normally need a specialist store.
When following any cold fermented pizza dough recipe, check the type of yeast being used. You’ll need less dried yeast than fresh. For example 10g of fresh is usually around 5g of dried and only 3g of active dried yeast.
You also have to remember that since we are making a cold fermented pizza dough thats fermenting over a longer period of time, you need less yeast.
This is because you’re slowing everything down and giving the yeast and flour longer to develop the gluten.
Salt
The final main ingredient is salt. You don’t need to worry about what type of salt, i’d just recommend sea salt.
OPTIONAL INGREDIENT: Olive Oil
The final ingredient is olive oil, however this is very much an optional ingredient. The need for olive oil does all depend on how your planning on cooking your pizza.
Traditional Neapolitan Pizza doesn’t require the use of Olive Oil. This is because its baked in a pizza oven that can hit extremely high temperatures and the olive oil will just burn.
If you’re baking it in your home oven, adding olive oil can help to give your crust a really nice extra cripsiness.
Hopefully that has helped understand the ingredients a bit more.
Next up, I’m going to go through my entire process of creating cold fermented pizza dough.
Making Our Cold Fermented Pizza Dough
When I started making pizza, I always thought a cold fermented dough would be hard.
It’s actually incredibly simple.
The only thing it really takes is time.
Here’s my step by step process.
Step One: Measure Out The Ingredients
The first thing I like to do is measure out all of the ingredients. The amounts you need are;
- 12.8 oz (364g)
- 4 tsp (18g) salt
- 1.8g active dried yeast
- 21.4oz (607g) “00” flour
Step Two: Prepare The Water
As mentioned before, you want lukewarm water. This helps to activate the yeast, if its too cold it wont do anything and if its too hot then it can kill the yeast.
I learnt a great method from Ooni. Take one third of the water and place this on heat until it starts to boil. Add this to the remaining two thirds and it should give you the ideal temperature.
I do this every time and it’s never failed me.
Step Three: Activate The Yeast
Now some cold fermented pizza dough recipes will suggest adding all the ingredients together at this point. I prefer not to.
Instead, I like to activate the yeast first. Place the salt in the warm water and give it a stir until the salt has fully dissolved.
I then add the yeast and again give this a light stir until it’s all mixed in. I then like to wait 5-10 minutes to give the yeast time to start reacting to the salt. You should see it working as it forms little bubbles or foam on the top.
Step Four: Combine All Ingredients
Once the yeast is ready, add it to a bowl of flour and give everything a good stir. You want to use a wooden spoon to mix and fairly quickly it will start to get sticky and come together.
I’ll often just get in there with my hands as quickly as possible. It makes it much easier to combine the flour and yeast mixture.
Continue mixing together until it forms your dough ball.
Step Five: Knead
When I first started making pizza dough, I was worried about kneading. I never knew if I was doing it right. I still wonder if I am but I’ve never had a bad pizza dough!
I simply push down with the palm of my hand and then roll the dough over on itself and repeat.
You want to give it a good knead for between 5-10 minutes.
You know you’re done when the dough is smoother, less sticky and has a decent elasticity. You can also poke it with your finger and if it raises back up then its ready to rest.
Step Six: Initial Cold Proof
Now this is the stage that the magic happens!
You want to place your dough into an airtight container and place it in the fridge. Make sure you give it plenty of room as it should double in size, if not more if you leave it longer.
Next place it in the fridge and leave it for at least 24 hours. I normally leave it for between 24-48 hours, but you can leave it up to 72.
Whilst it’s in the fridge, the yeast will be doing its thing and developing a really nice pizza dough.
Step Seven: Divide Dough
You may see some recipes suggesting that you place the dough into individual dough balls before you do the cold proof.
I personally like to get the cold proof done and then divide the dough into individual dough balls.
This means I can give them their final proof as dough balls, so when im ready I simply get each ball and shape and bake!
Get your dough and divide it into roughly 3-4 individual pieces. The amount you get does depend on how big you want your pizza to be.
I normally go for around 250g for 12 inch and then 300-330g for a 16 inch pizza.
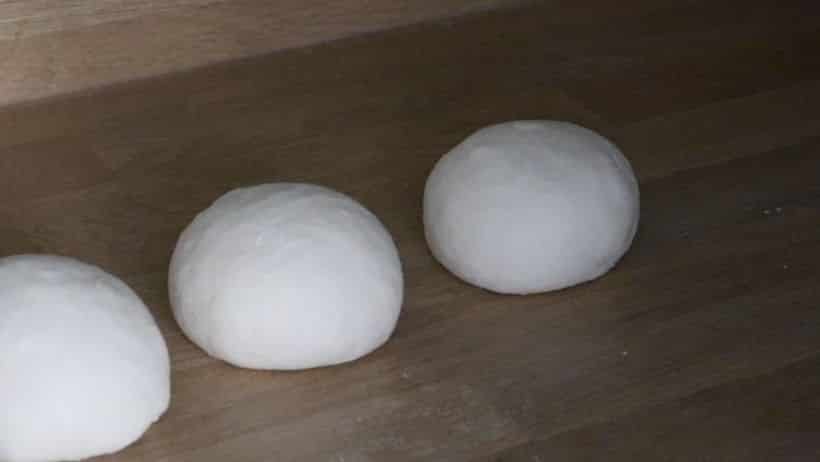
You then want to “ball” the dough. This is simply placing the individual pieces into dough balls.
We do this as it makes it not only easier to shape but also helps to give us a circle shape base.
It can take a bit of practice but below is a video I did showing how to “Ball” the dough.
Step Eight: Final Proof
Once you’ve separated your dough into equal dough balls.
Final Thoughts
My go to pizza dough is this cold fermented recipe. It is just so convenient when you want to make pizza at the end of the week. You can simply make it 1-2 days before you need to and leave it in the fridge.
One of the advantages of making a cold fermented pizza dough is that it helps to form a dough that expands more in the oven and gives you a lovely light dough.
Typically you’d use a wood-fired pizza oven, I’d recommend the Ooni Fyra or the Ooni Koda.
It is however possible to come close to replicating the results in your home oven. Since you cannot get it to the high temperatures of a pizza oven, you need to use a pizza stone.
This will help to crisp up the pizza base and get additional heat into the dough,giving it a more authentic look and taste.
Now when it comes to toppings, I would recommend going with the saying “less is more”
The idea of Neapolitan Pizza Dough is that it does tend to be thinner. You therefore do not want to weigh it down too much with your toppings.
I often go for a nice homemade pizza sauce, and then do a nice Pepperoni Pizza. Although you can generally make any pizza you want, thats the great thing about pizza!
This is the best cold fermented pizza dough recipe that I’ve tried and this is based on many years of testing. (plus many failed attempts!)
I do hope you found this helpful! Any questions, please feel free to post them below.